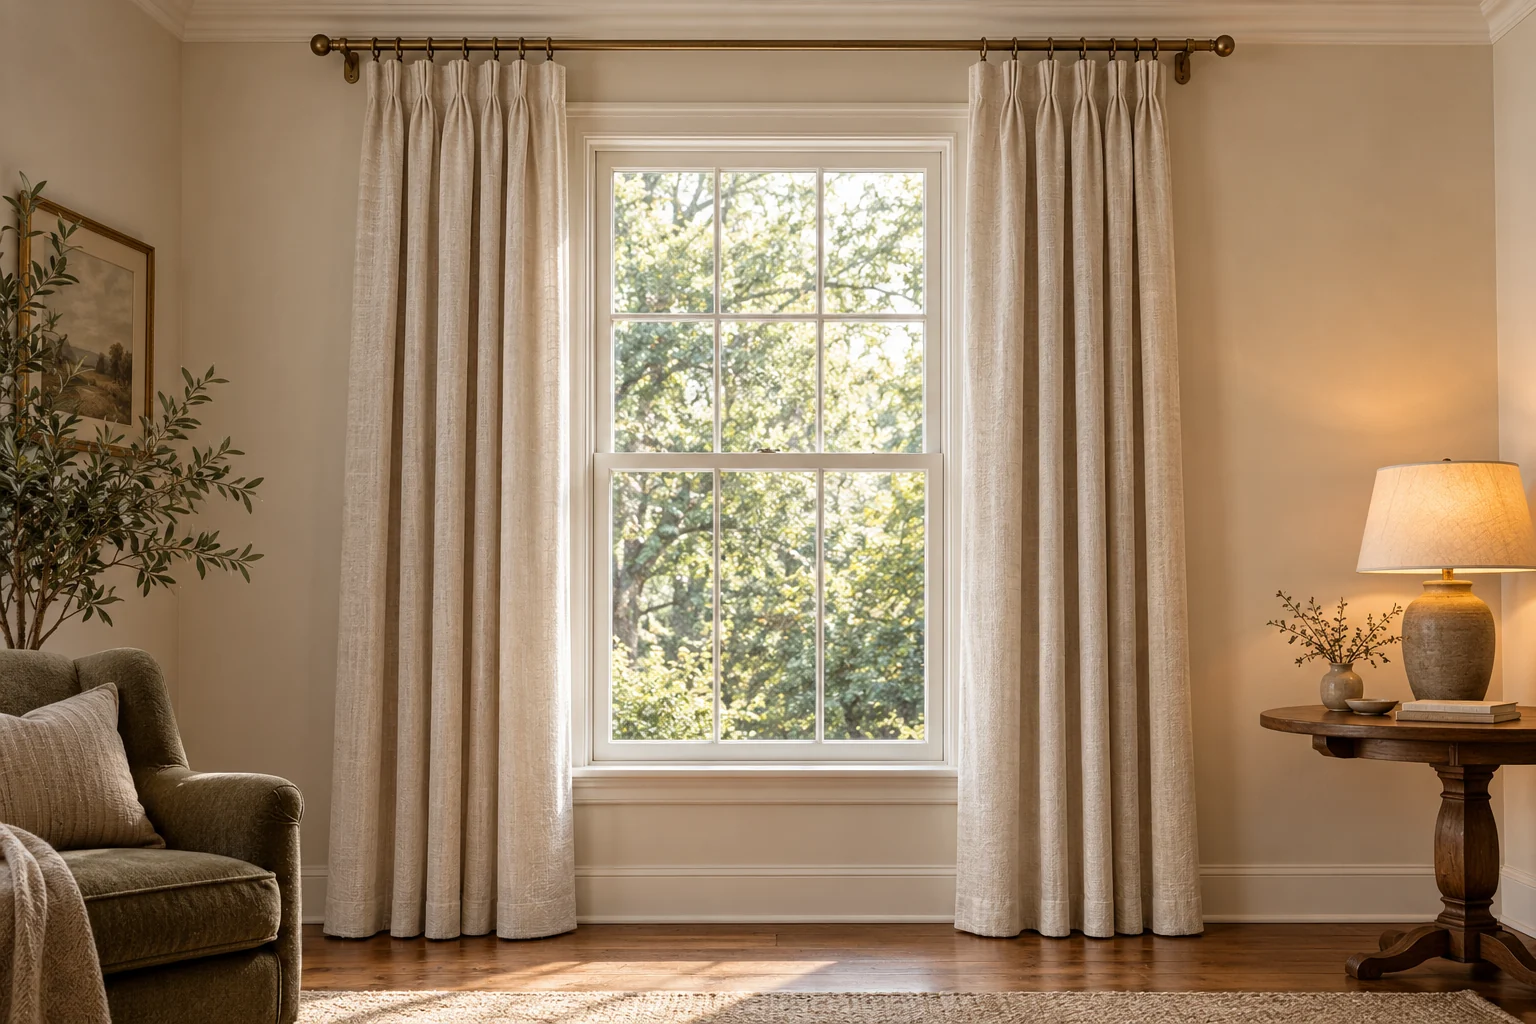
Curtains can change the apparent proportions of a room before you replace a single piece of furniture. A rod sitting just above the window and panels stopping well short of the floor create a strong horizontal break. Raise the starting point, let the fabric fall in an uninterrupted line, and the same wall can feel taller and more composed.
The most useful approach is to plan the whole arrangement together: where the hardware sits, where the open curtains gather, and where the hems finish. A little measuring now saves the disappointment of beautiful fabric that cannot quite reach the floor.
Start with the wall above the window
Look at the space between the top of the window trim and the ceiling. In a room with ordinary ceiling height, placing the rod in the upper part of that space is a useful visual starting point. It carries the eye beyond the window instead of emphasizing where the frame stops.
Test the position with small pieces of painter’s tape suitable for your wall finish. Stand back from the doorway and check the relationship to nearby doors, shelving, and other windows. Windows on the same wall often look calmer with a shared curtain height, provided their hardware and opening clearances allow it.
Treat that taped line as a design decision, not a drilling guide. Leave the clearance your hardware needs for brackets, rings, and installation. With crown molding, keep the assembly clear of the trim rather than squeezing it against the lower edge. A ceiling track can create a particularly continuous line, but it needs suitable ceiling fixings and room for the curtain folds.
In a very tall room, taking curtains all the way to the ceiling can make a modest window feel disconnected from its surroundings. Test a lower position that still gives the window breathing room.
Give the open curtains somewhere to go
Curtains occupy space even when they are open. The gathered fabric at each side is called the stack, and its width depends on the fabric, lining, heading, and amount of material.
Begin by measuring the window from the outside edge of one side of the trim to the other. Then plan enough rod or track beyond it for the panels to gather mostly beside the glass. This helps preserve daylight and makes the window treatment feel more generous.
As an initial sketch, try an extension of around 6 to 12 inches on each side where the wall permits. Check the actual stack before committing: thick lined panels may need more space, while a nearby corner may leave less. Decorative end pieces, called finials, need their own room and do not provide usable hanging space. Brackets also affect how far rings can travel.
Extension is different from projection. Extension runs sideways beyond the window; projection is how far the rod sits out from the wall. Choose enough projection for the fabric to clear the sill, handles, and any existing blind without catching.
Choose the heading before deciding the length
The heading is the top of the curtain, where it connects to the hardware. It changes both the appearance and the measurement.
Pleated curtains on rings offer a tailored line, while a track can keep the hardware discreet. Grommet curtains pass directly over a rod, with some fabric sitting above it. A rod pocket behaves differently again. These arrangements cannot share one universal rod-to-hem calculation.
Choose the rod or track, rings, hooks, and heading together. Then follow the curtain maker’s measuring convention. Some ask for a measurement from a ring’s small eye or a hook position; others ask for the top of the rod or track and apply a hardware deduction. Confirm whether the stated length means the full fabric length or a drop measured from a particular attachment point.
If you already own panels, hang one on the intended hardware temporarily and safely before marking the final bracket position. That test shows where the fabric actually begins and ends.
Let the hem finish cleanly
For curtains you open daily, a small clearance above the floor gives a neat finish and helps the hem move freely. Around half an inch is a useful starting point to test, with the final clearance adjusted for the floor, fabric, and maker’s guidance.
Measure down from the correct hardware reference at the left, middle, and right. Floors are not always level. Check the highest point beneath the curtain’s travel so the fabric does not drag as it moves. A rug beneath part of the opening needs to be included in that check.
A slight break on the floor can suit a softer room, but a generous puddle needs more arranging and cleaning. When the aim is a taller-looking room with easy daily use, a straight, nearly floor-length fall is usually the simpler choice.
Check care instructions before hemming. Washable fabric may need laundering first, and some materials can change length after hanging. Avoid choosing the mounting height solely to suit the nearest standard panel length; allow for hemming a longer panel when practical.
Buy enough width for soft folds
Length creates the vertical line, but width gives curtains their presence. Panels stretched flat across a rod can look thin even when their length is right.
For ready-made panels sold by their flat width, roughly twice the intended coverage width is a useful planning example for a gathered finish. The right fullness depends on the heading and fabric, so check the maker’s recommendation. Add the widths of all panels together, and confirm whether the package contains one panel or a pair.
Custom and pre-pleated curtains may be sold by finished coverage, with fullness already built in. Do not double that measurement again. Ask how the maker handles center overlap and the fabric returning toward the wall at the sides.
Put the measurements together
Imagine a window measuring 60 inches across its outer trim, with clear wall space on both sides. Allowing 10 inches beyond each edge gives an 80-inch rod span, excluding finials. If the chosen flat panels suit a two-times fullness, their combined width would be 160 inches, or two 80-inch panels.
For this example, the ceiling is 96 inches above the floor and the window trim ends at 80 inches. The proposed top of the rod is at 92 inches. Assume the selected hardware has been checked and places the top of the curtain fabric 2 inches below that point, at 90 inches. A half-inch floor clearance then gives a finished fabric length of 89½ inches.
Those numbers illustrate the relationships. The 2-inch hardware allowance belongs only to this example, and bracket screw positions still come from the actual hardware template. Your wall space, fittings, floor, and curtain heading determine your own measurements.
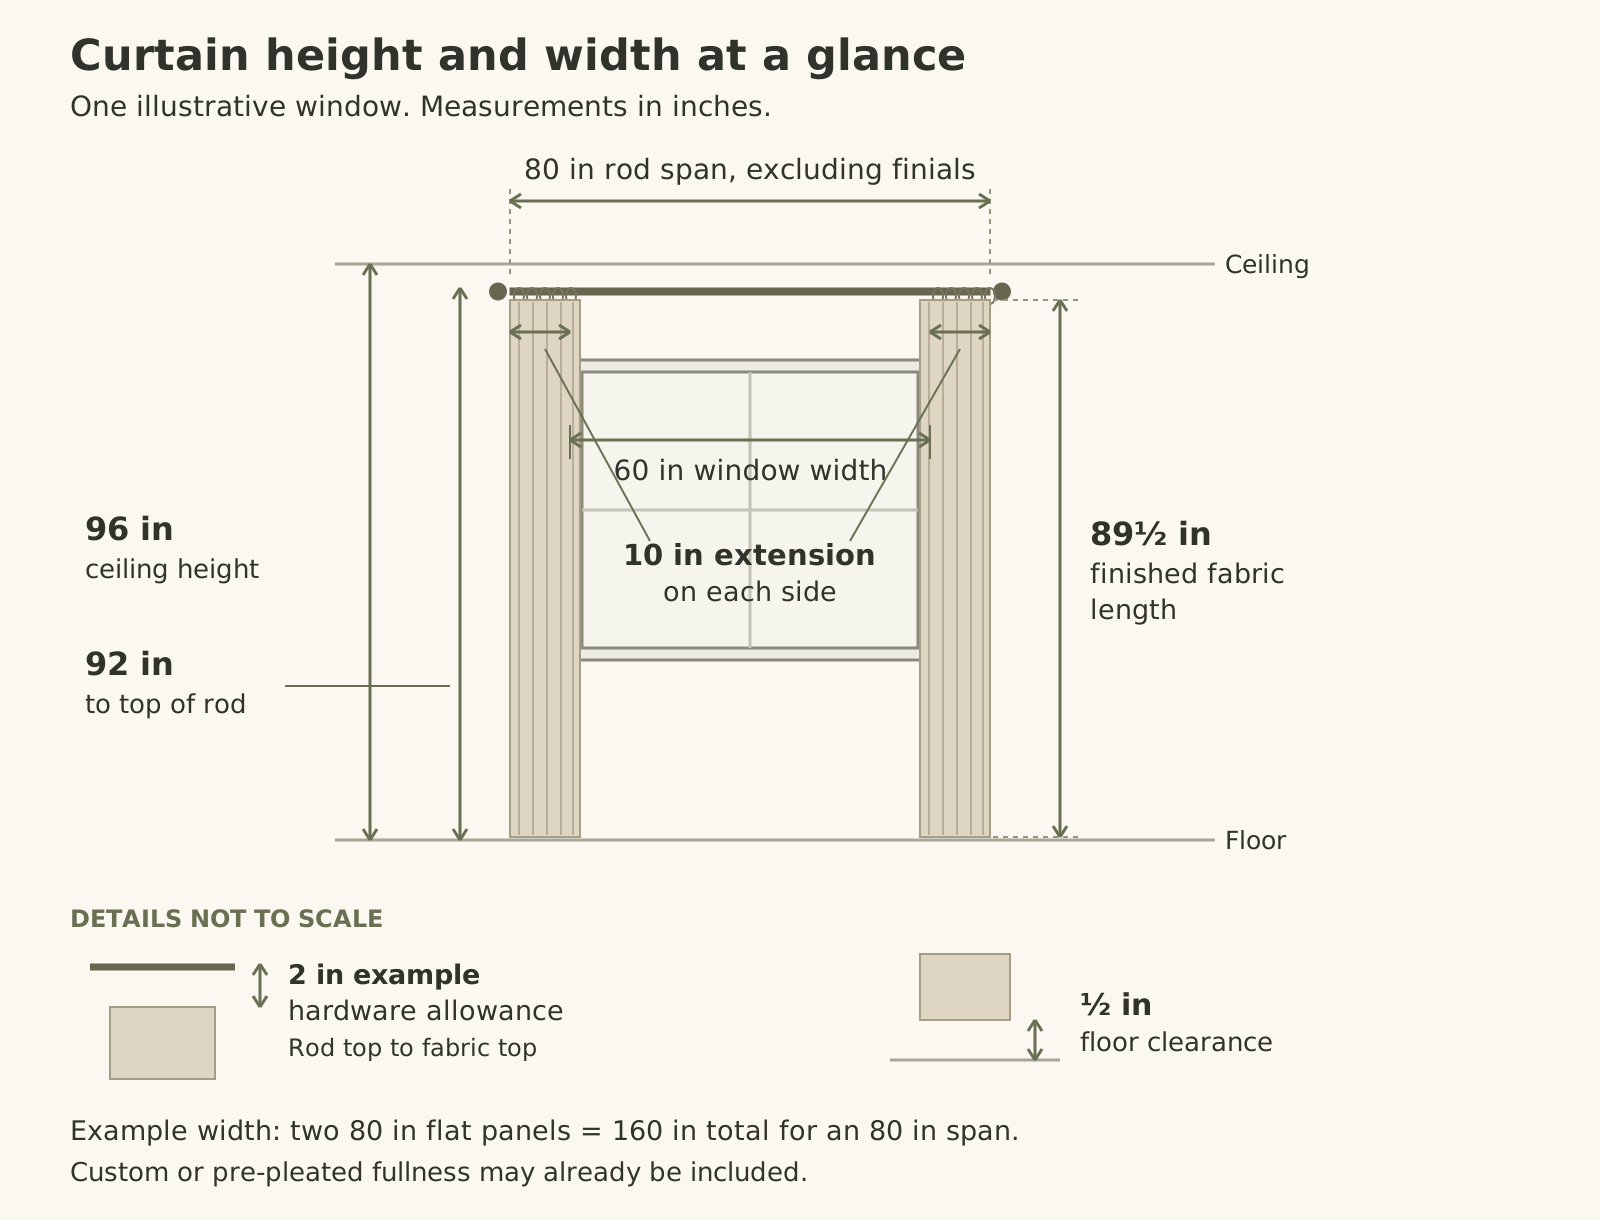
Illustrative measurements only. Choose hardware first, follow its measuring and fixing instructions, and check curtain stack, floor levels, and clearances before installation.
Check the practical limits before drilling
Follow the hardware instructions for load limits, bracket spacing, center supports, and fixings suitable for the wall or ceiling. Check for hidden services before drilling; get qualified help if the surface or fixing method is uncertain.
Keep curtains clear of heat sources, vents, and opening doors. Follow the appliance manufacturer’s clearance requirements around radiators or heaters. Where full-length fabric cannot hang safely, a properly fitted shade may suit the window better. In a rental, confirm permission before drilling and check the stated load and surface requirements of any no-drill alternative.
Where young children live or visit, choose cordless window coverings and keep beds and climbable furniture away from window cords. The CPSC’s window-covering safety guidance explains the hazards.
Finish with the fabric itself
Once the curtains are hung, remove packaging creases according to the care label and arrange the folds gently from top to bottom. Open and close them several times. Check that they travel easily, meet comfortably, and clear the floor throughout their movement.
A fabric close to the wall color can make the vertical line feel especially quiet. A contrasting fabric gives the window more definition. Either can work beautifully when the mounting height, fullness, and hem feel considered.
For more ways to refine a room through proportion and finishing details, explore our guide to making your home look expensive without overspending. Start here with one window, measure it carefully, and let a well-hung pair of curtains give the whole wall a more graceful shape.